Google Workspace provides productivity and collaboration tools for professionals, startups, enterprises, education departments, and large organizations to streamline workflows and manage daily tasks efficiently. After enrolling in the relevant Google Workspace plan, add and invite users and assign them the relevant roles.
Once your Google Workspace plan is up and running, adjust your email settings, enable security features like 2-Step Verification, add third-party integrations, and configure collaboration features in your productivity apps. You’re now set up to add and manage users through the Google Workspace admin console. This is a web portal that you can access from your desktop, Mac, or Chromebook.
Google Workspace Business edition customers can add up to 300 users to their account.
Creating email addresses for Google Workspace users: Overview
All accounts with a Google Workspace plan have access to the following services and features:
- Login credentials, such as your name and password, to log in to the Google Workspace app.
- Unique email address using your domain.
- Easily customizable contact names or profiles.
Google Workspace billing
If you have a variable number of employees and choose one of the Google Workspace flexible plans, your company will bill you monthly based on the number of user accounts you have in a given month. Adding user accounts will increase your monthly charges on your next payment.
If your business is on an annual plan, purchase a user license for each account you add. User license is Google Workspace Admin Console by choosing Claim > Regular purchase. To accommodate your new license, Google will automatically increase your monthly payment. It may take up to 48 hours for a new license to be available in your account.
If you’re on a free trial of Google Workspace or on one of the Business plans (Starter, Standard, or Plus) and you’ve reached the 300 user limit, you can’t add user licenses.
Add users to Google Workspace and compose emails
Now that you have a basic overview of new user accounts and how they affect your billing details, follow these steps to create a new user email in Google Workspace.
- going to Google Workspace Admin Console Sign in with an administrator account.
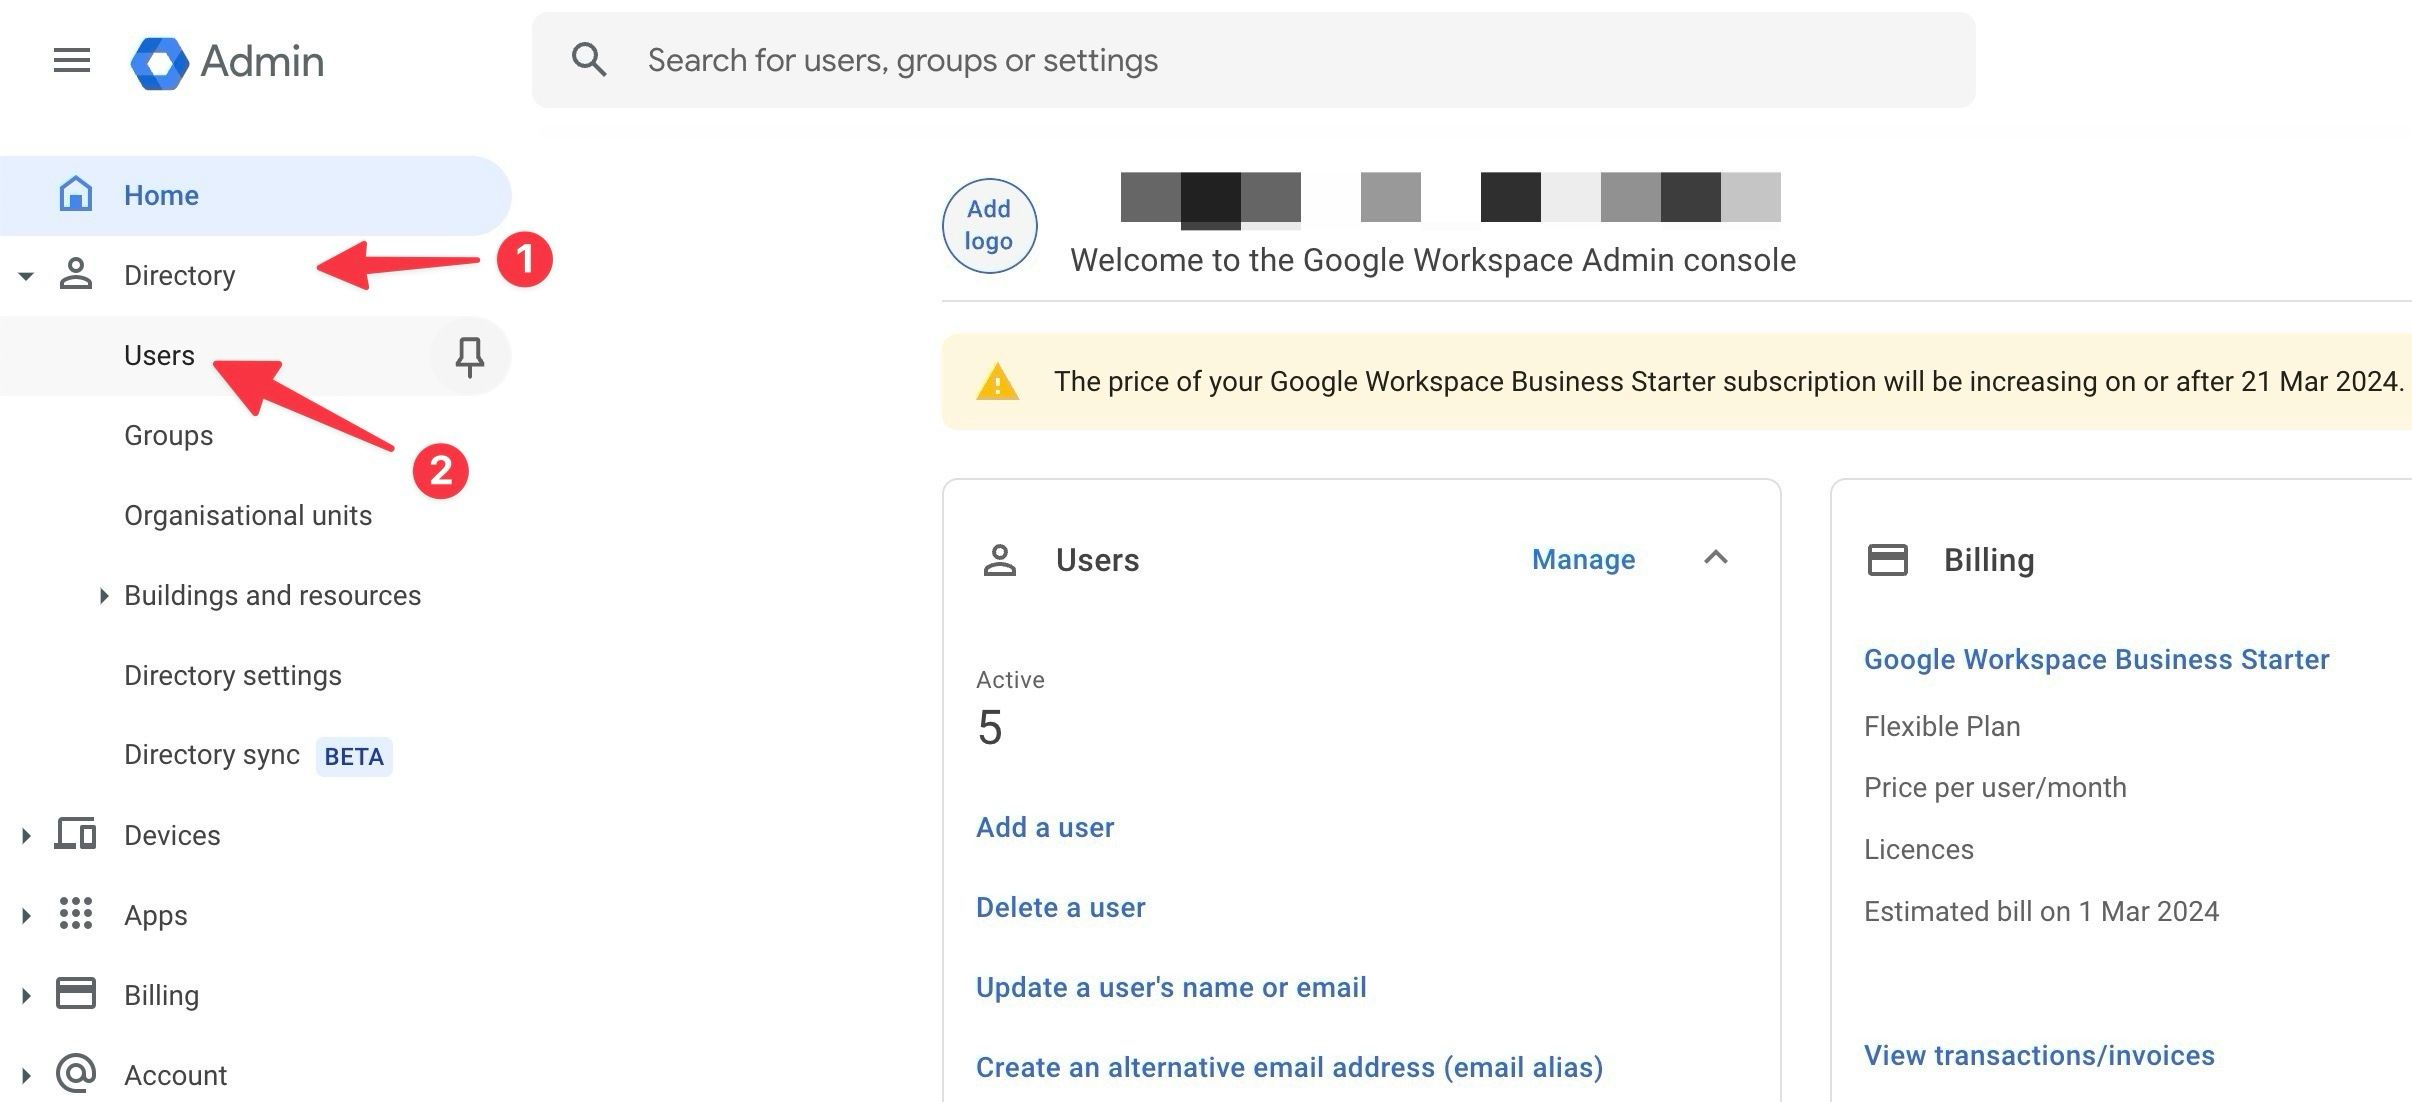
- Expand the side menu and select directory.
- click user.
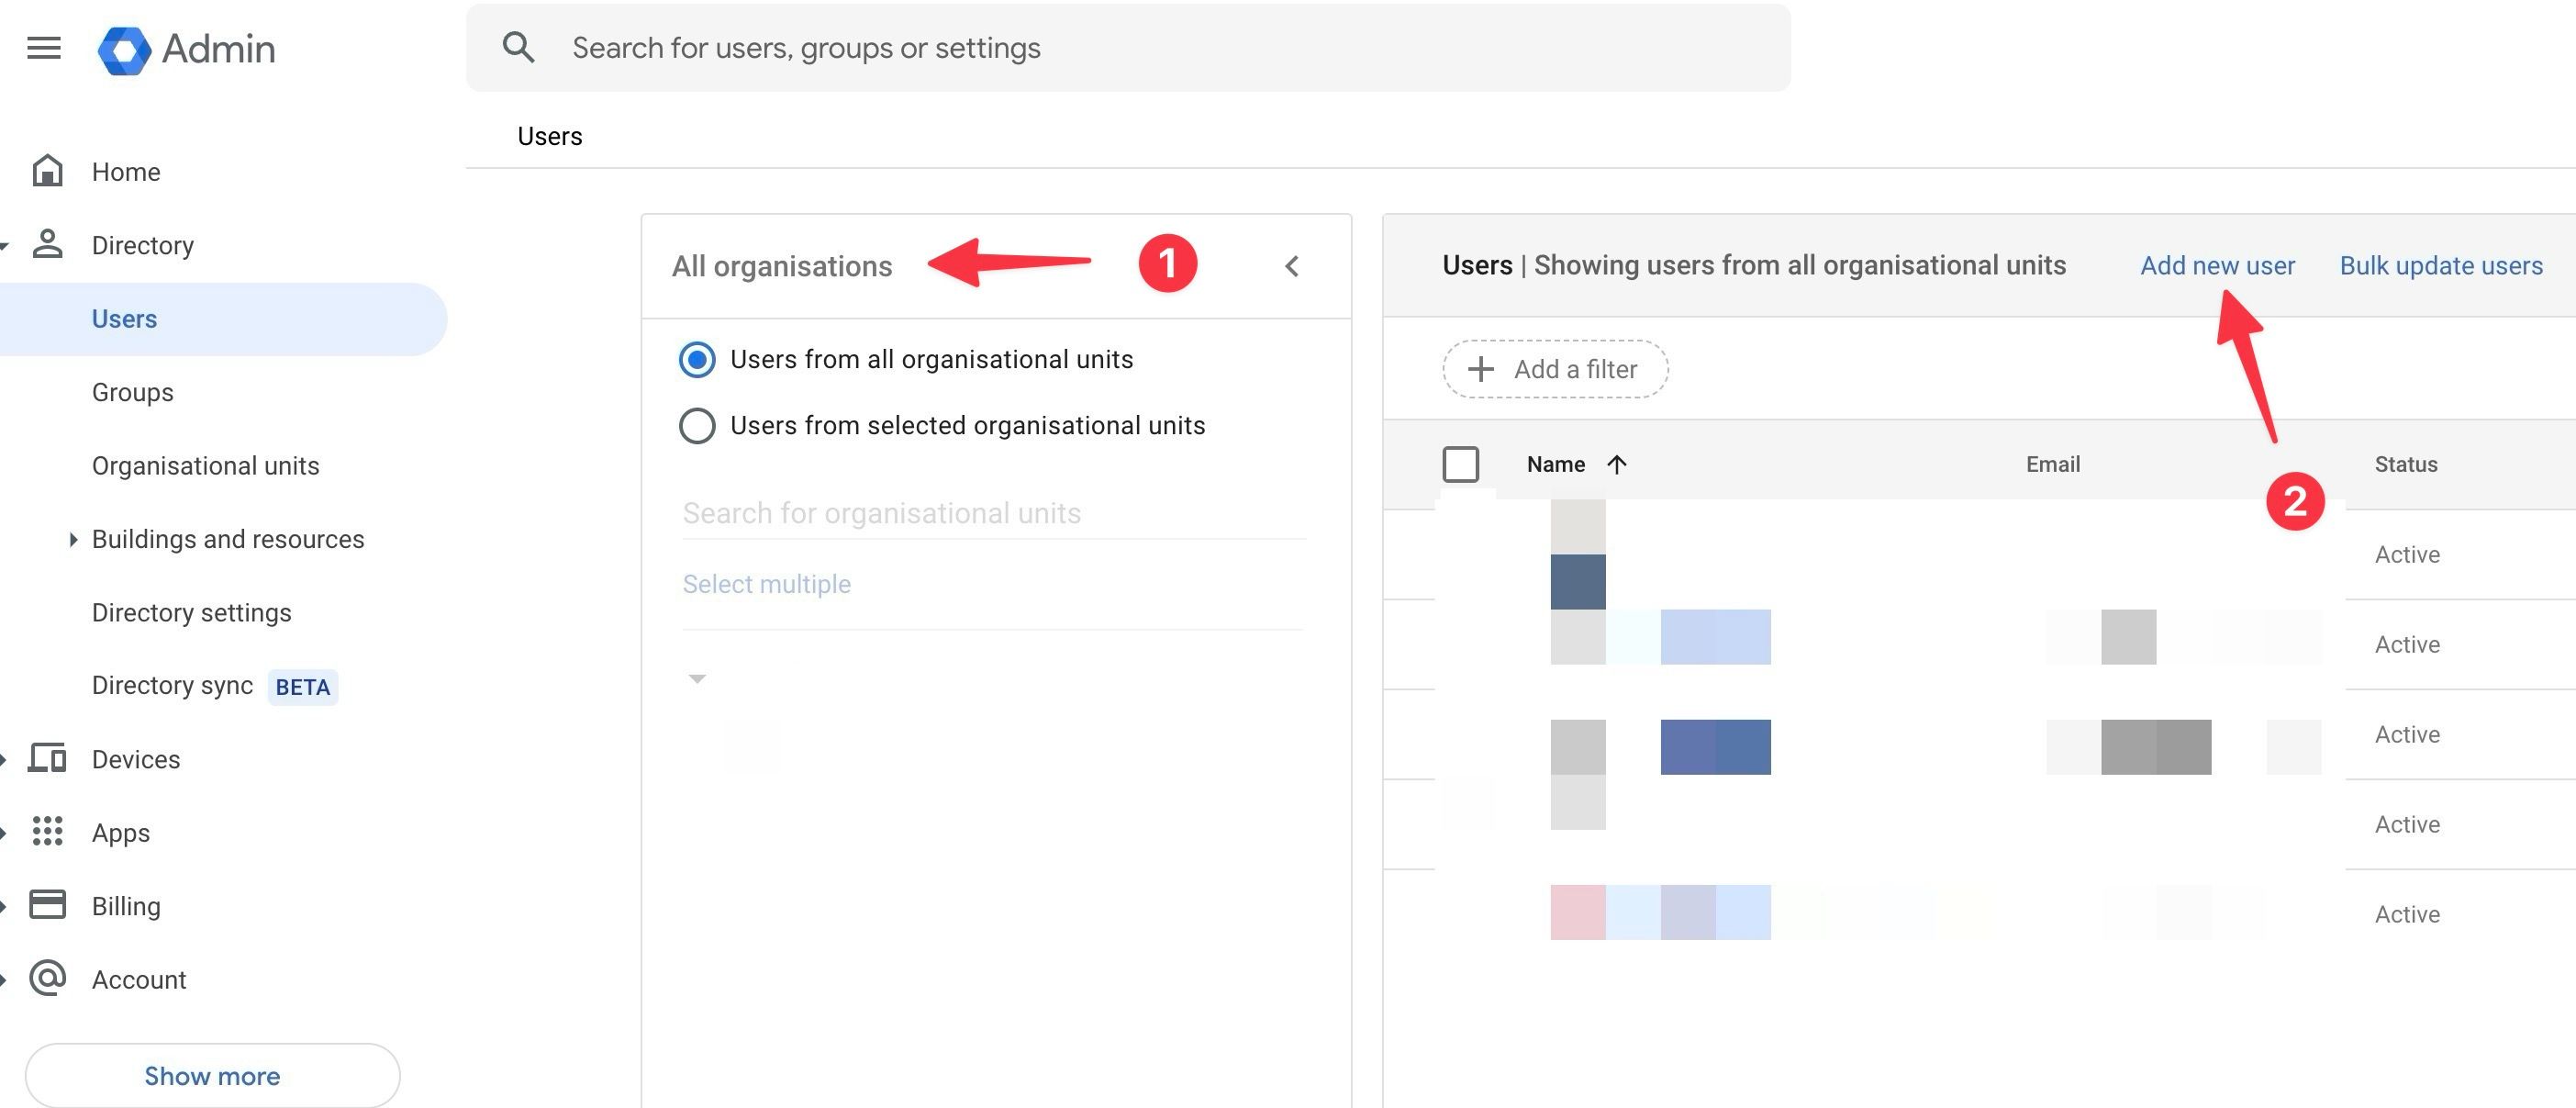
- under all organizationsClick and select the organizational unit to which you want to add the new user. Displays a list of current users, email addresses, status, last sign-in status, and email usage.
- click Add new user At the top.
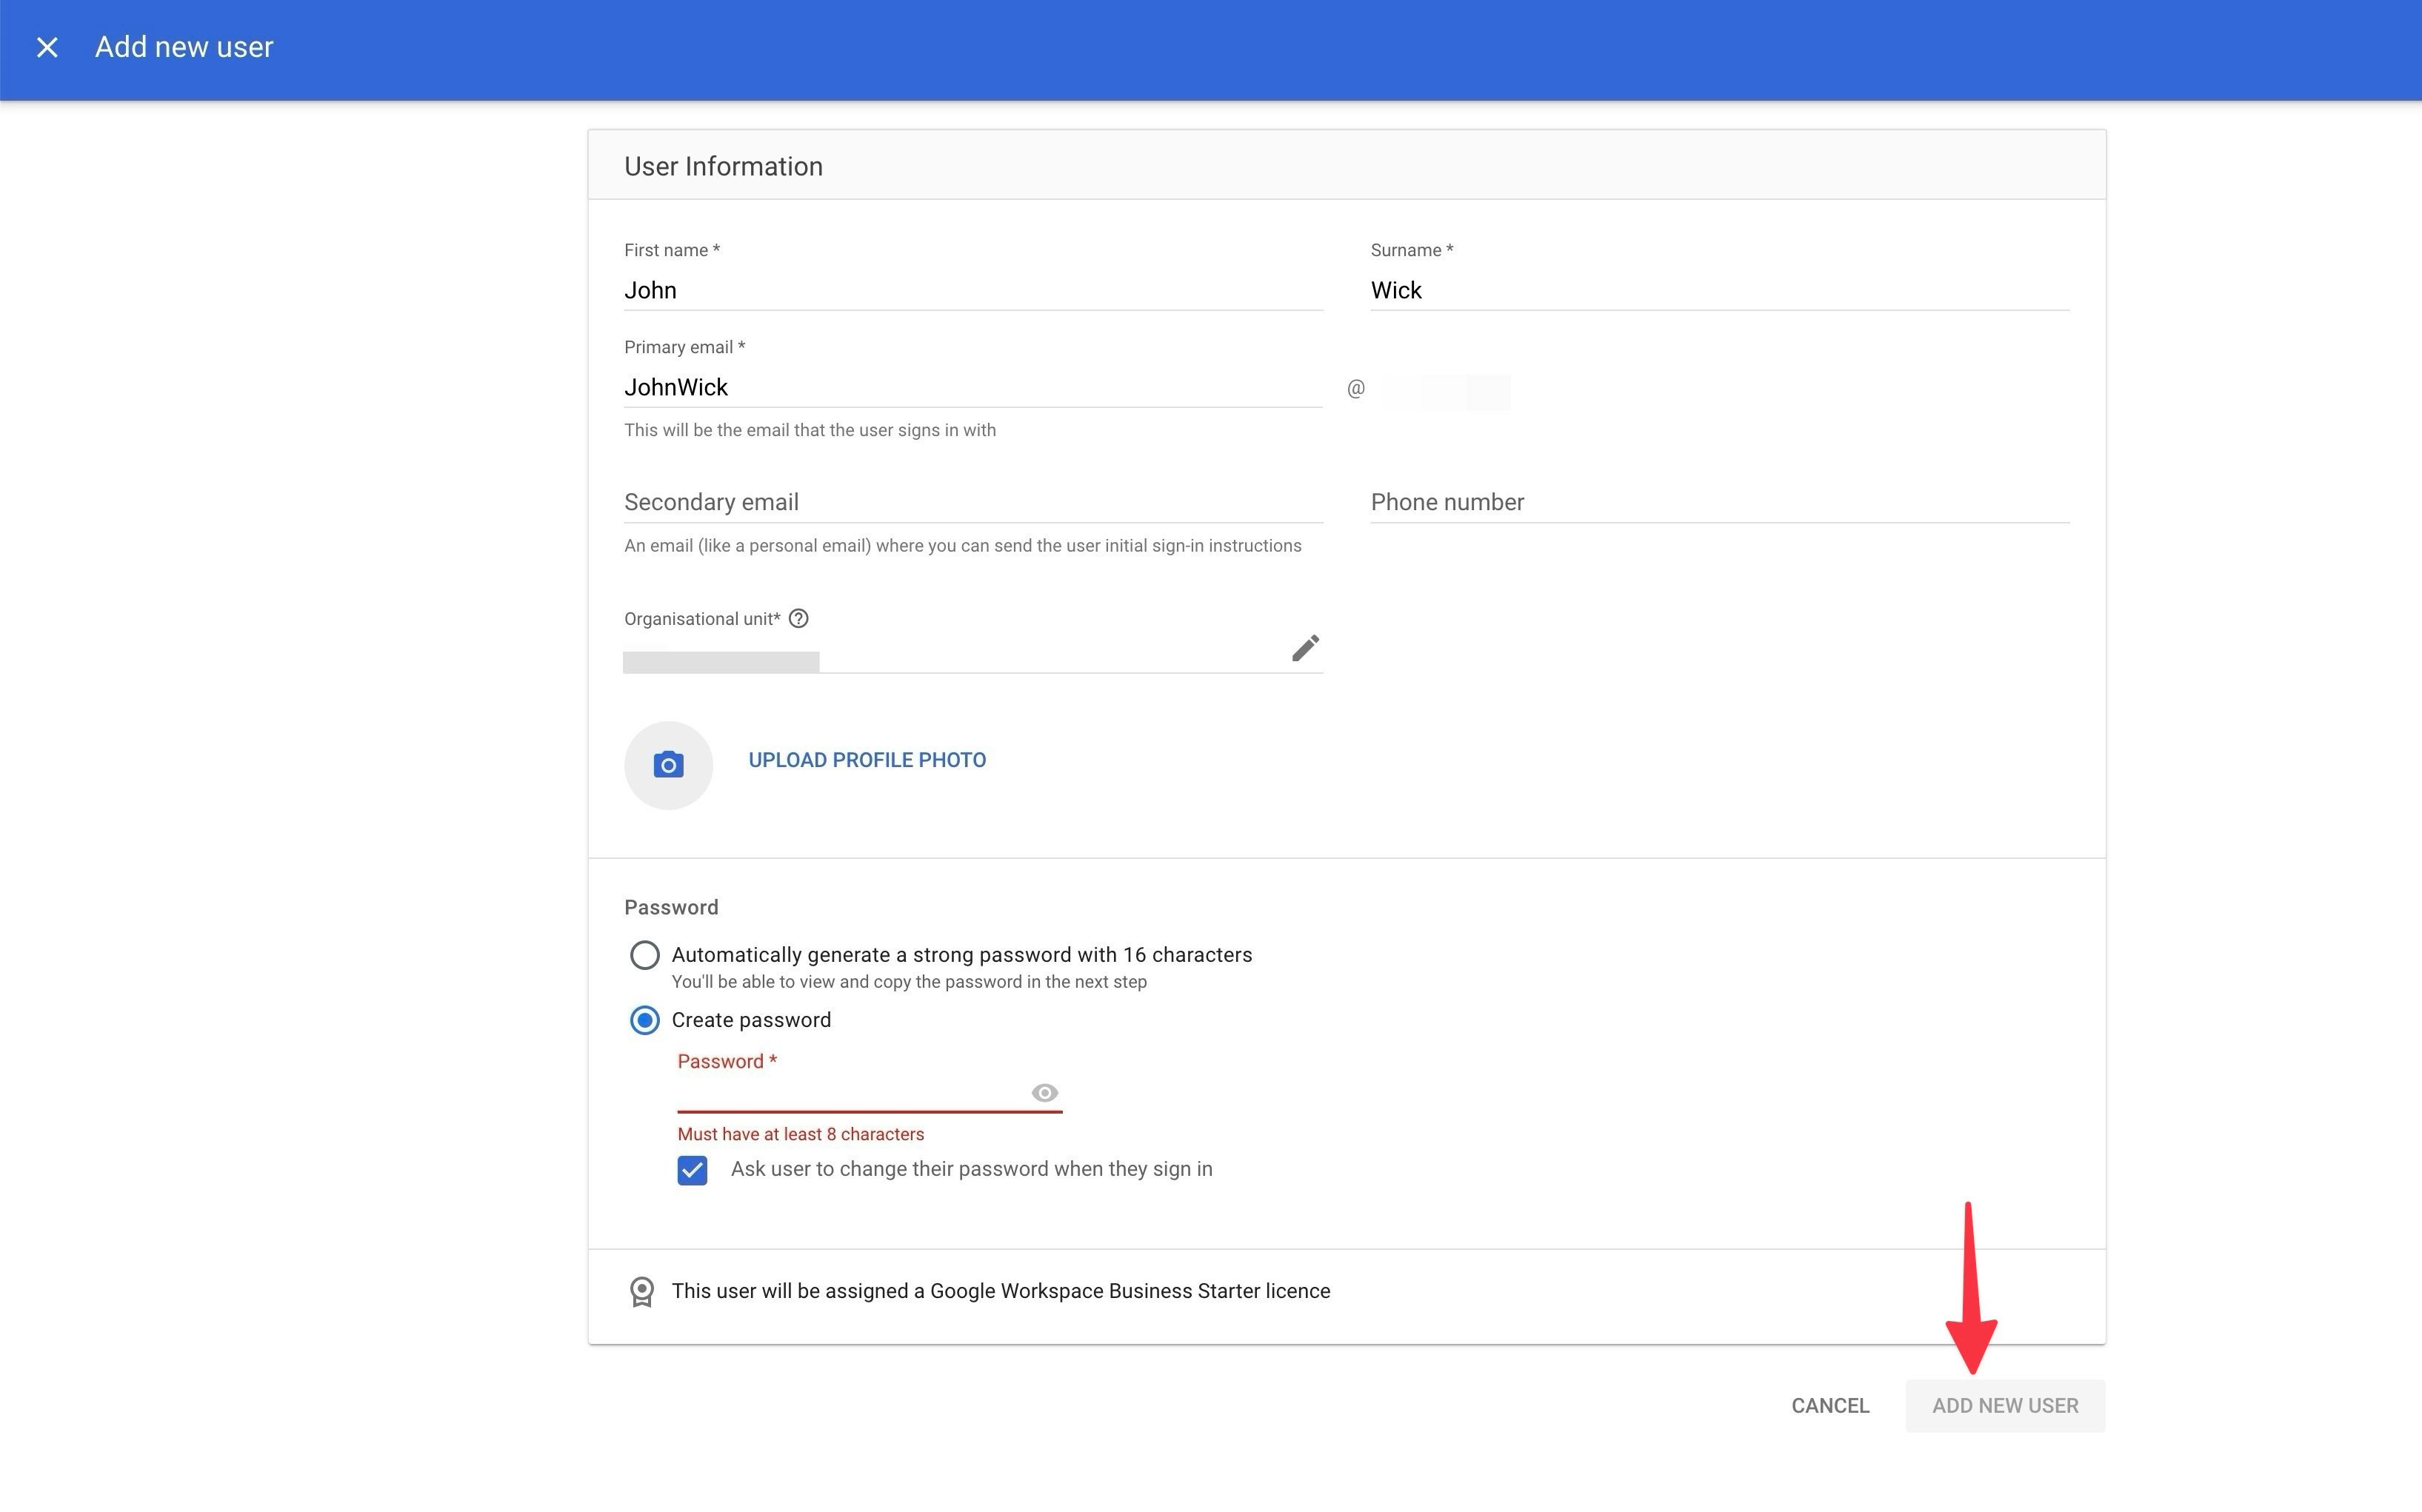
- In the user information form, enter your first name, last name, primary email address (the email you use to sign in), secondary email (such as a personal email address that you can send sign-in instructions to), phone number, and complete your profile. Upload. Enter your image and create a password.
- Automatically generate a strong 16-character password or add one manually.
- select Add new user.
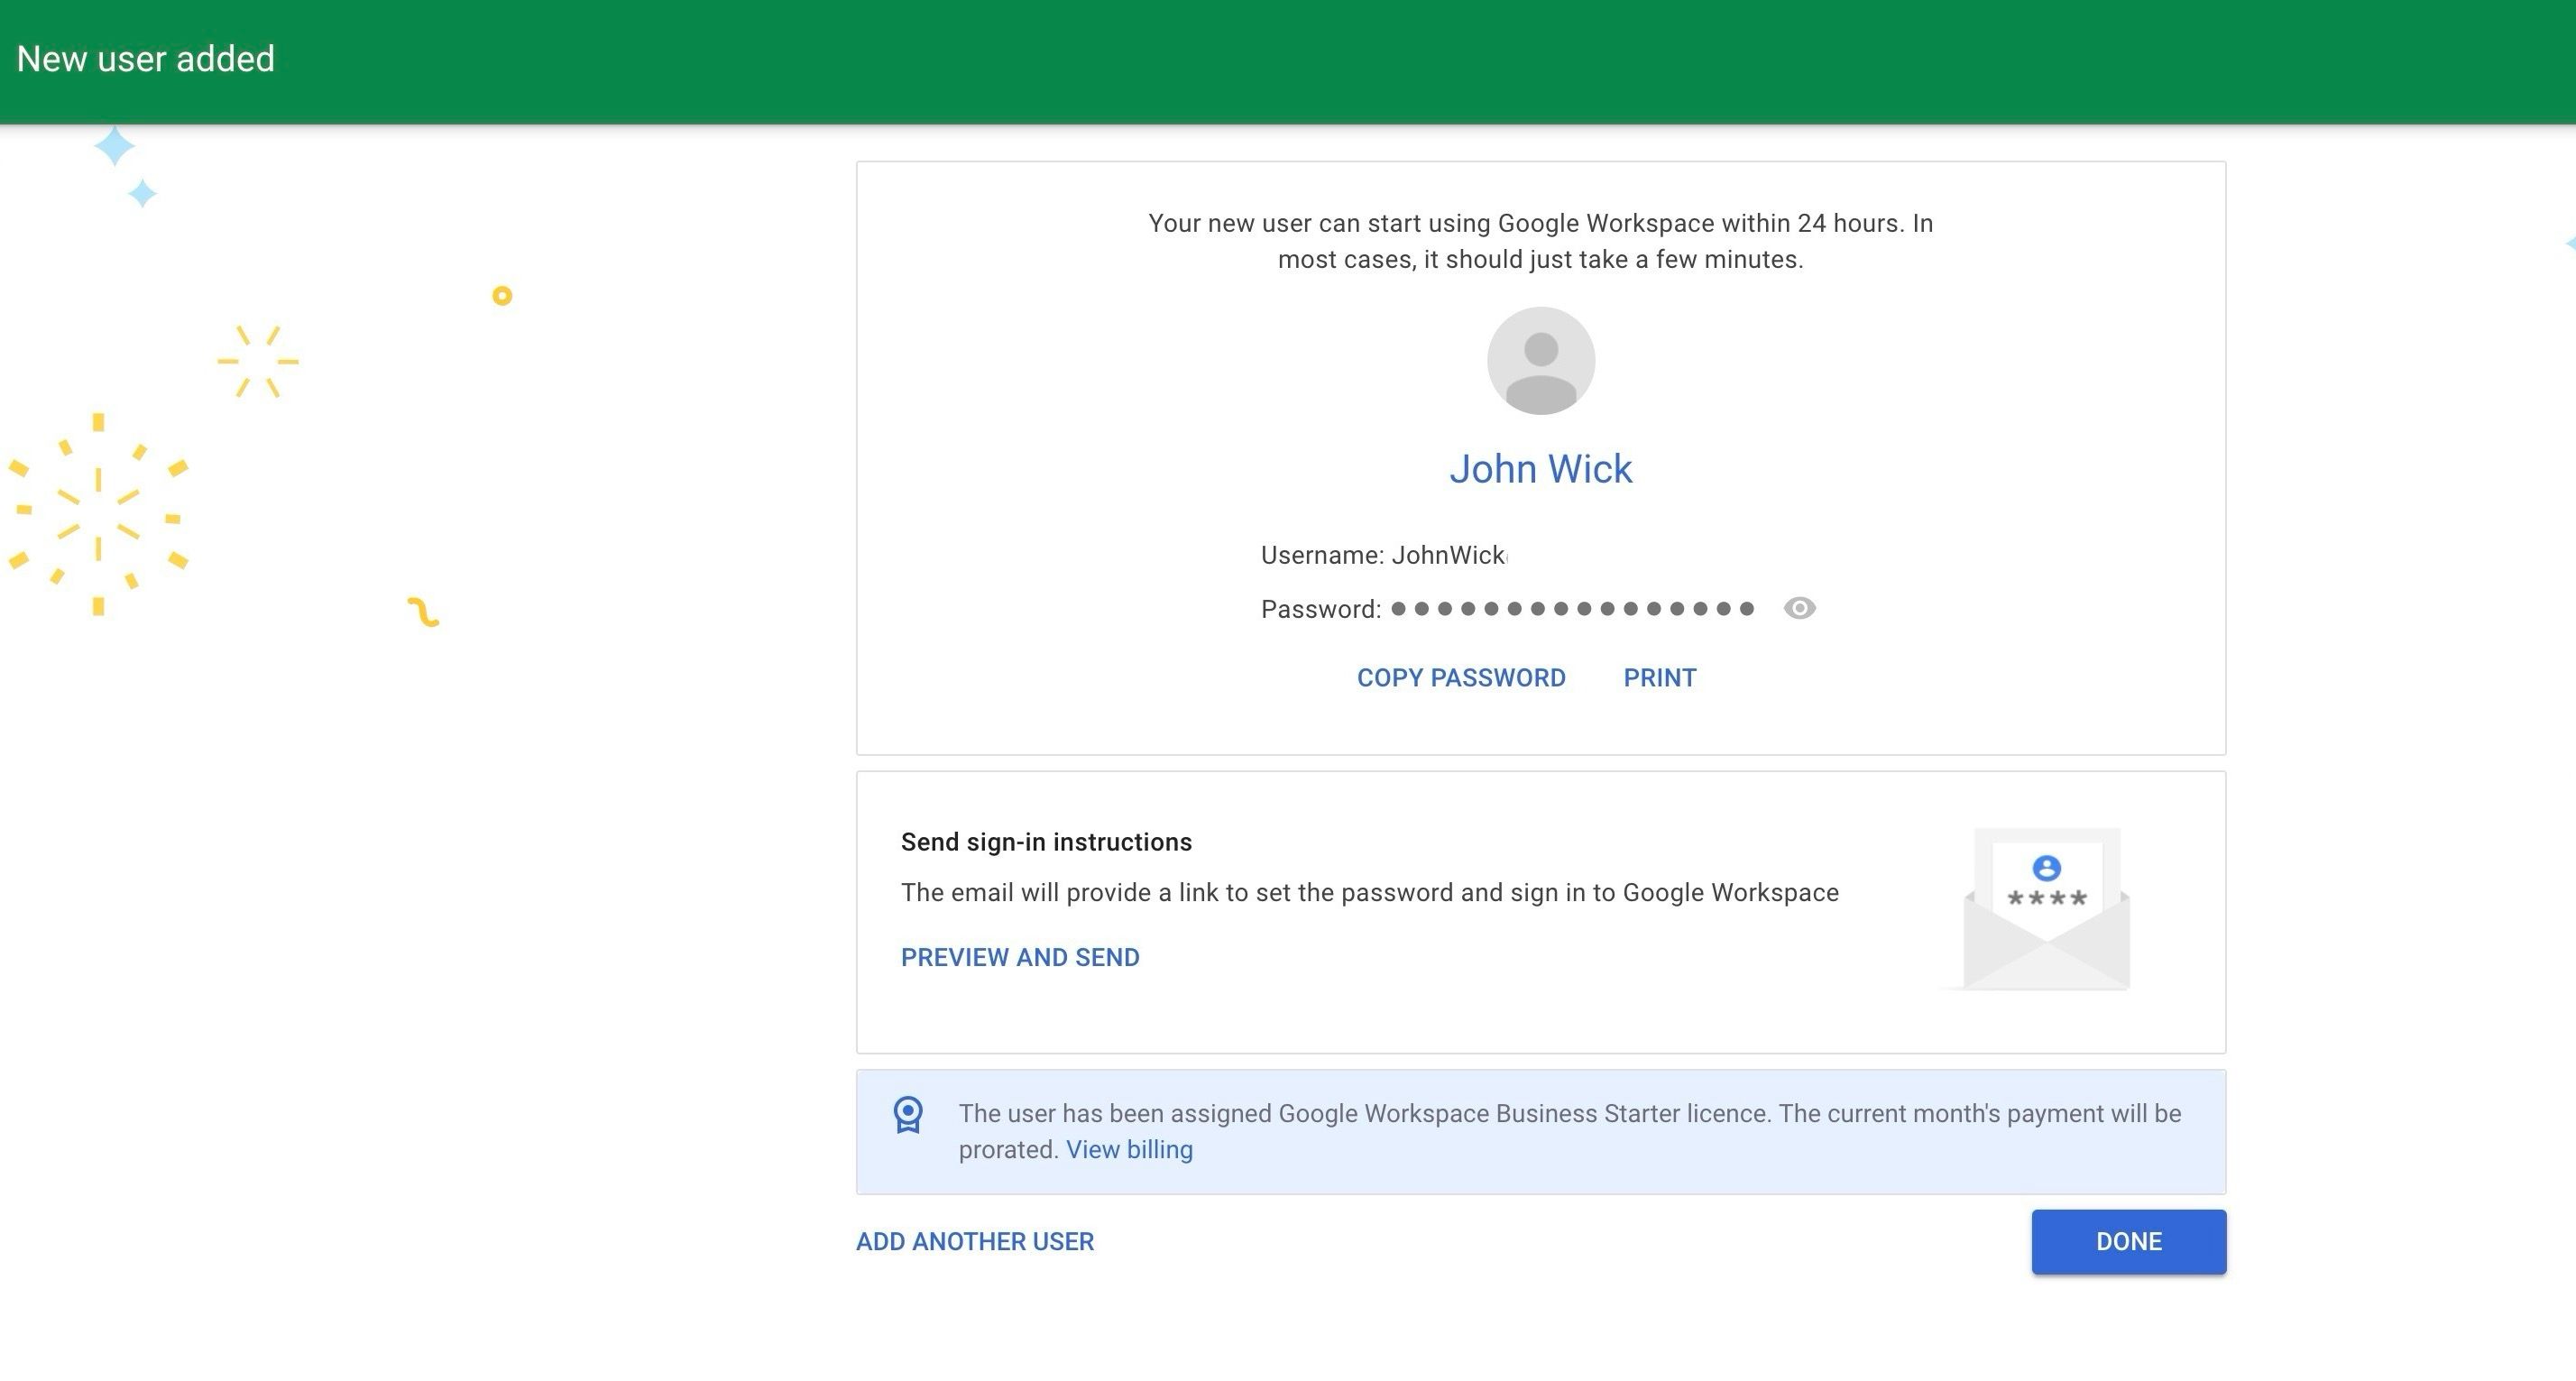
- We’ll review your user preview, including profile photo, username, password, and send you an email with sign-in instructions.click end.
You can add another user from the same menu. Adding a new account allows the user to use the new account using the user’s email and password. However, it may take up to 24 hours for all Google Workspace services to be available.
You also need to add the user’s email to the group email list and add employee information to the corporate directory.
Add multiple users to Google Workspace at the same time
If you plan to add multiple users to your Google Workspace plan, the method above can be time-consuming. Instead, use CSV import to add multiple users. Here’s how:
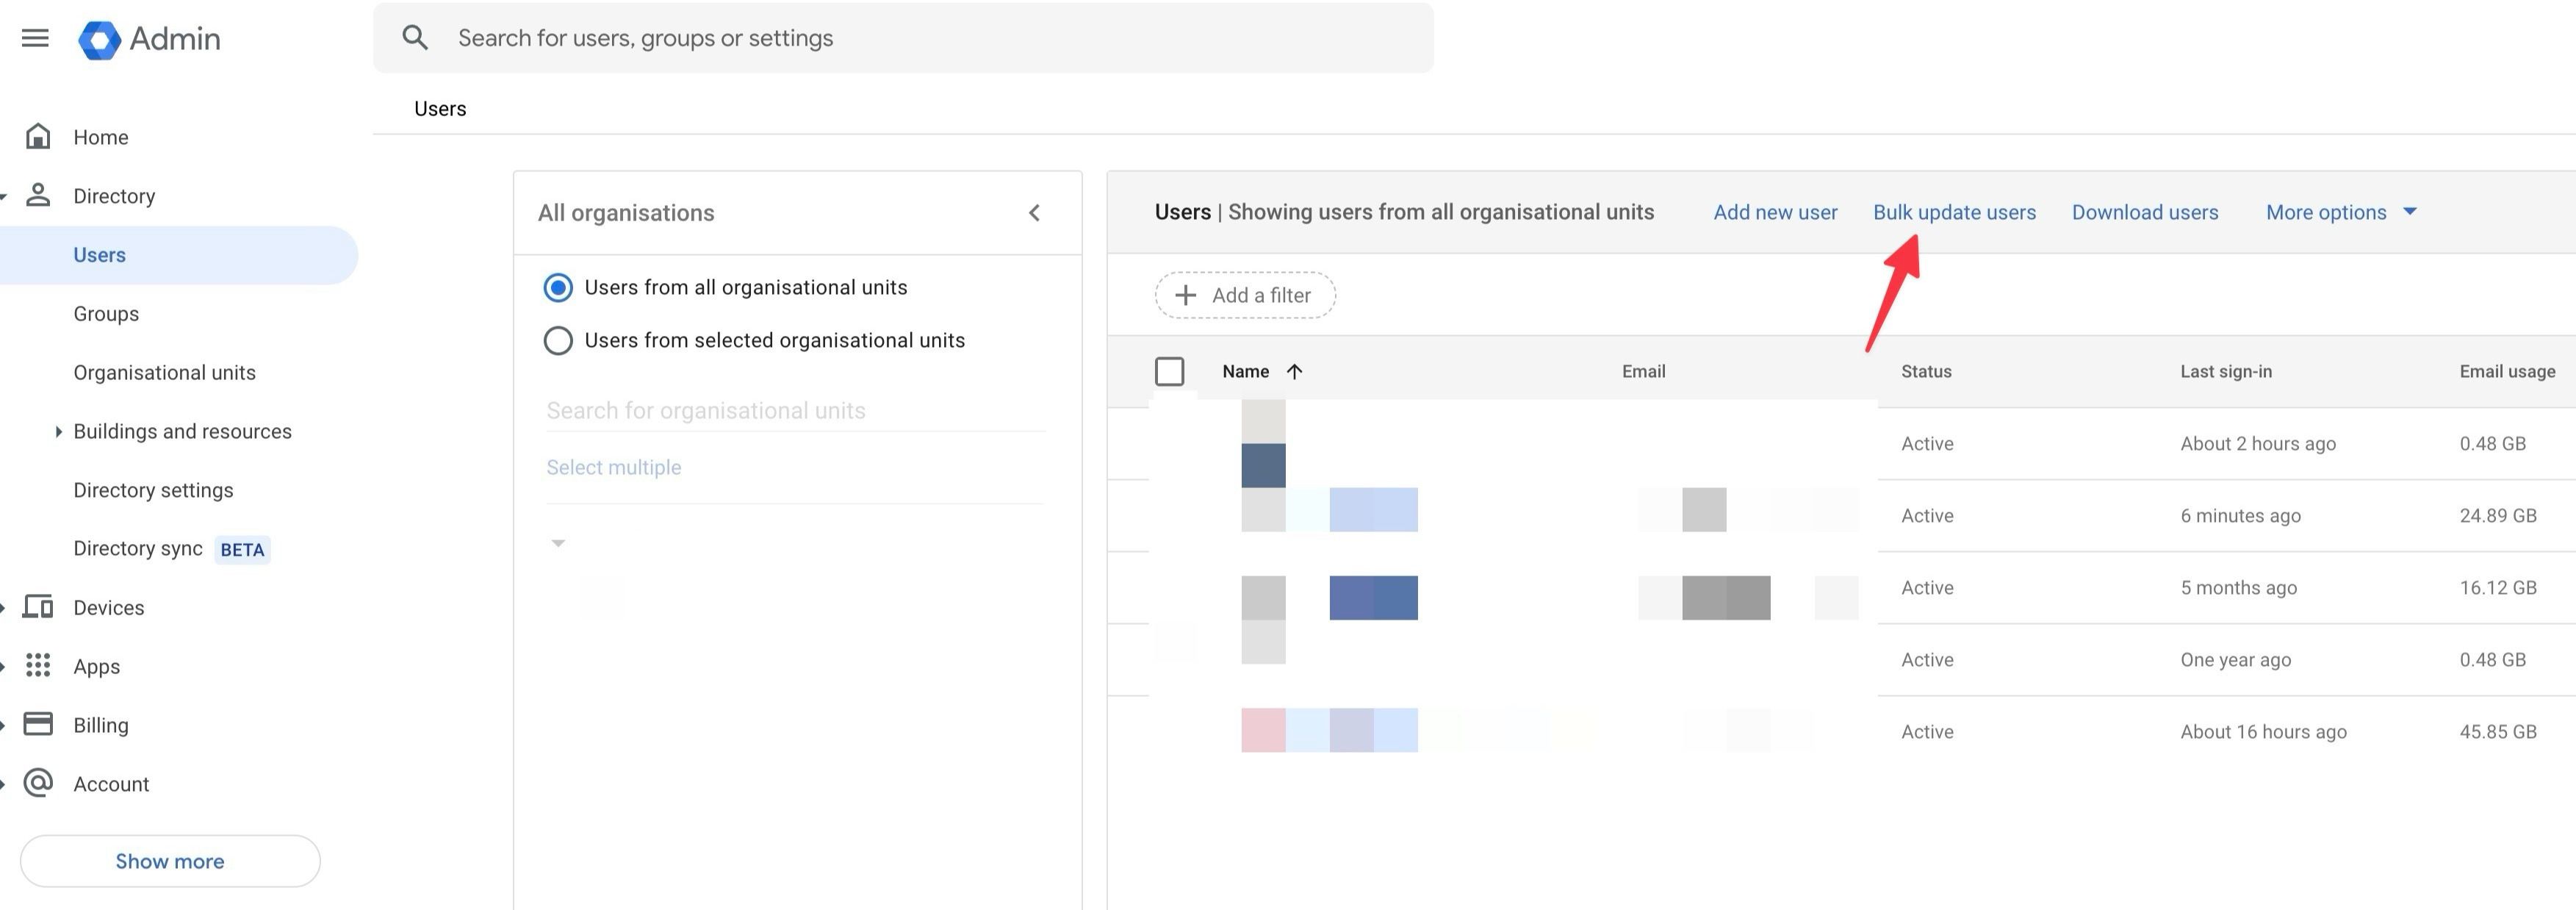
- going to user Admin console menu (see instructions above).
- Select an organizational unit. A user list will be displayed.
- click Bulk update users.
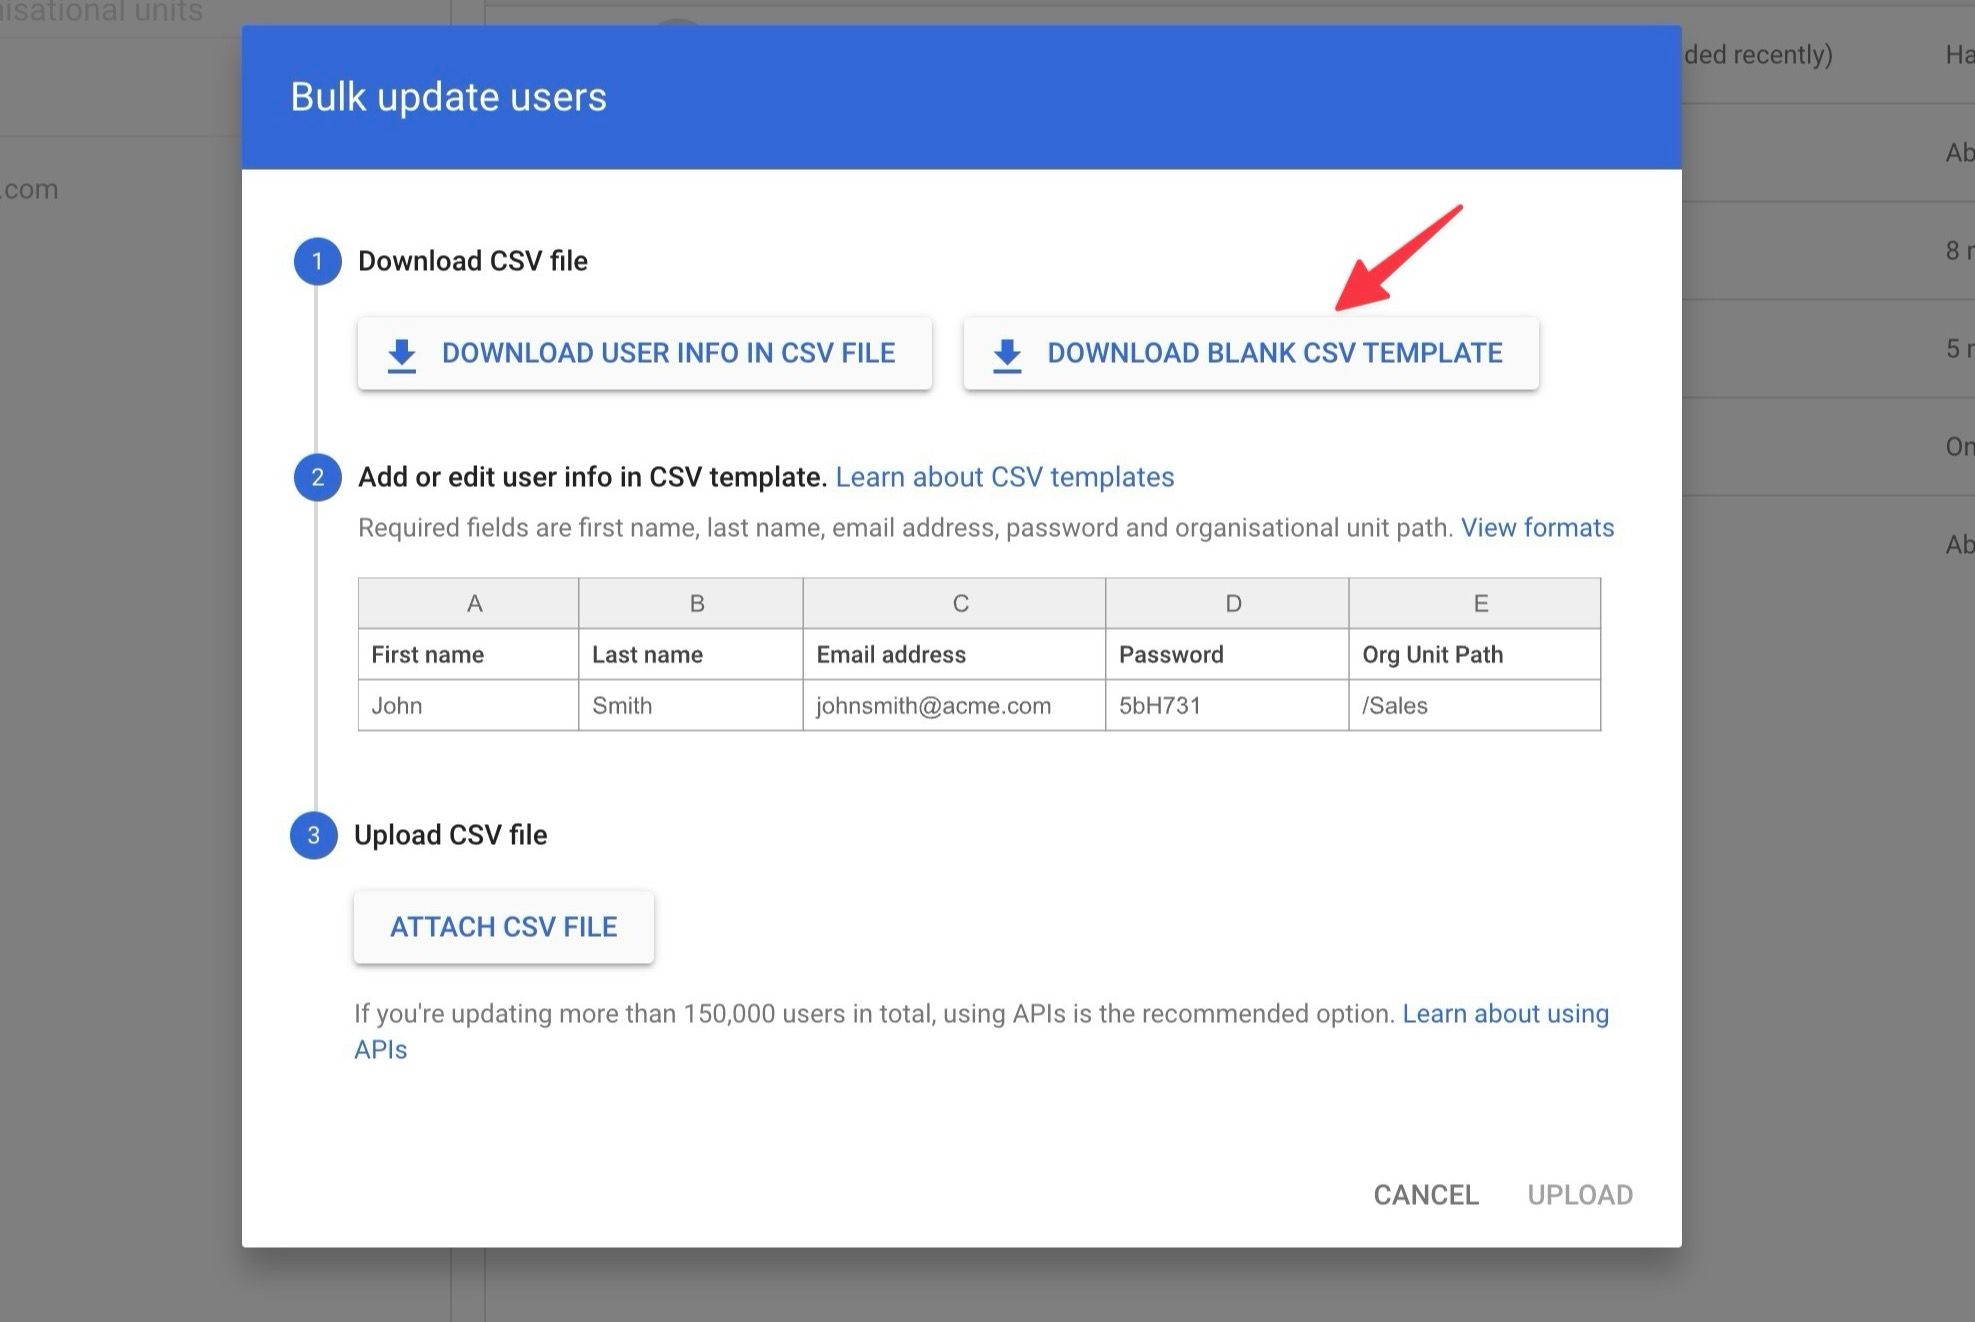
- Download a blank CSV template from the menu below and open it in Google Sheets or Microsoft Excel.
- Enter details such as first name, last name, email address, password, and organizational unit path under the relevant columns. Please check the screenshot above for reference.
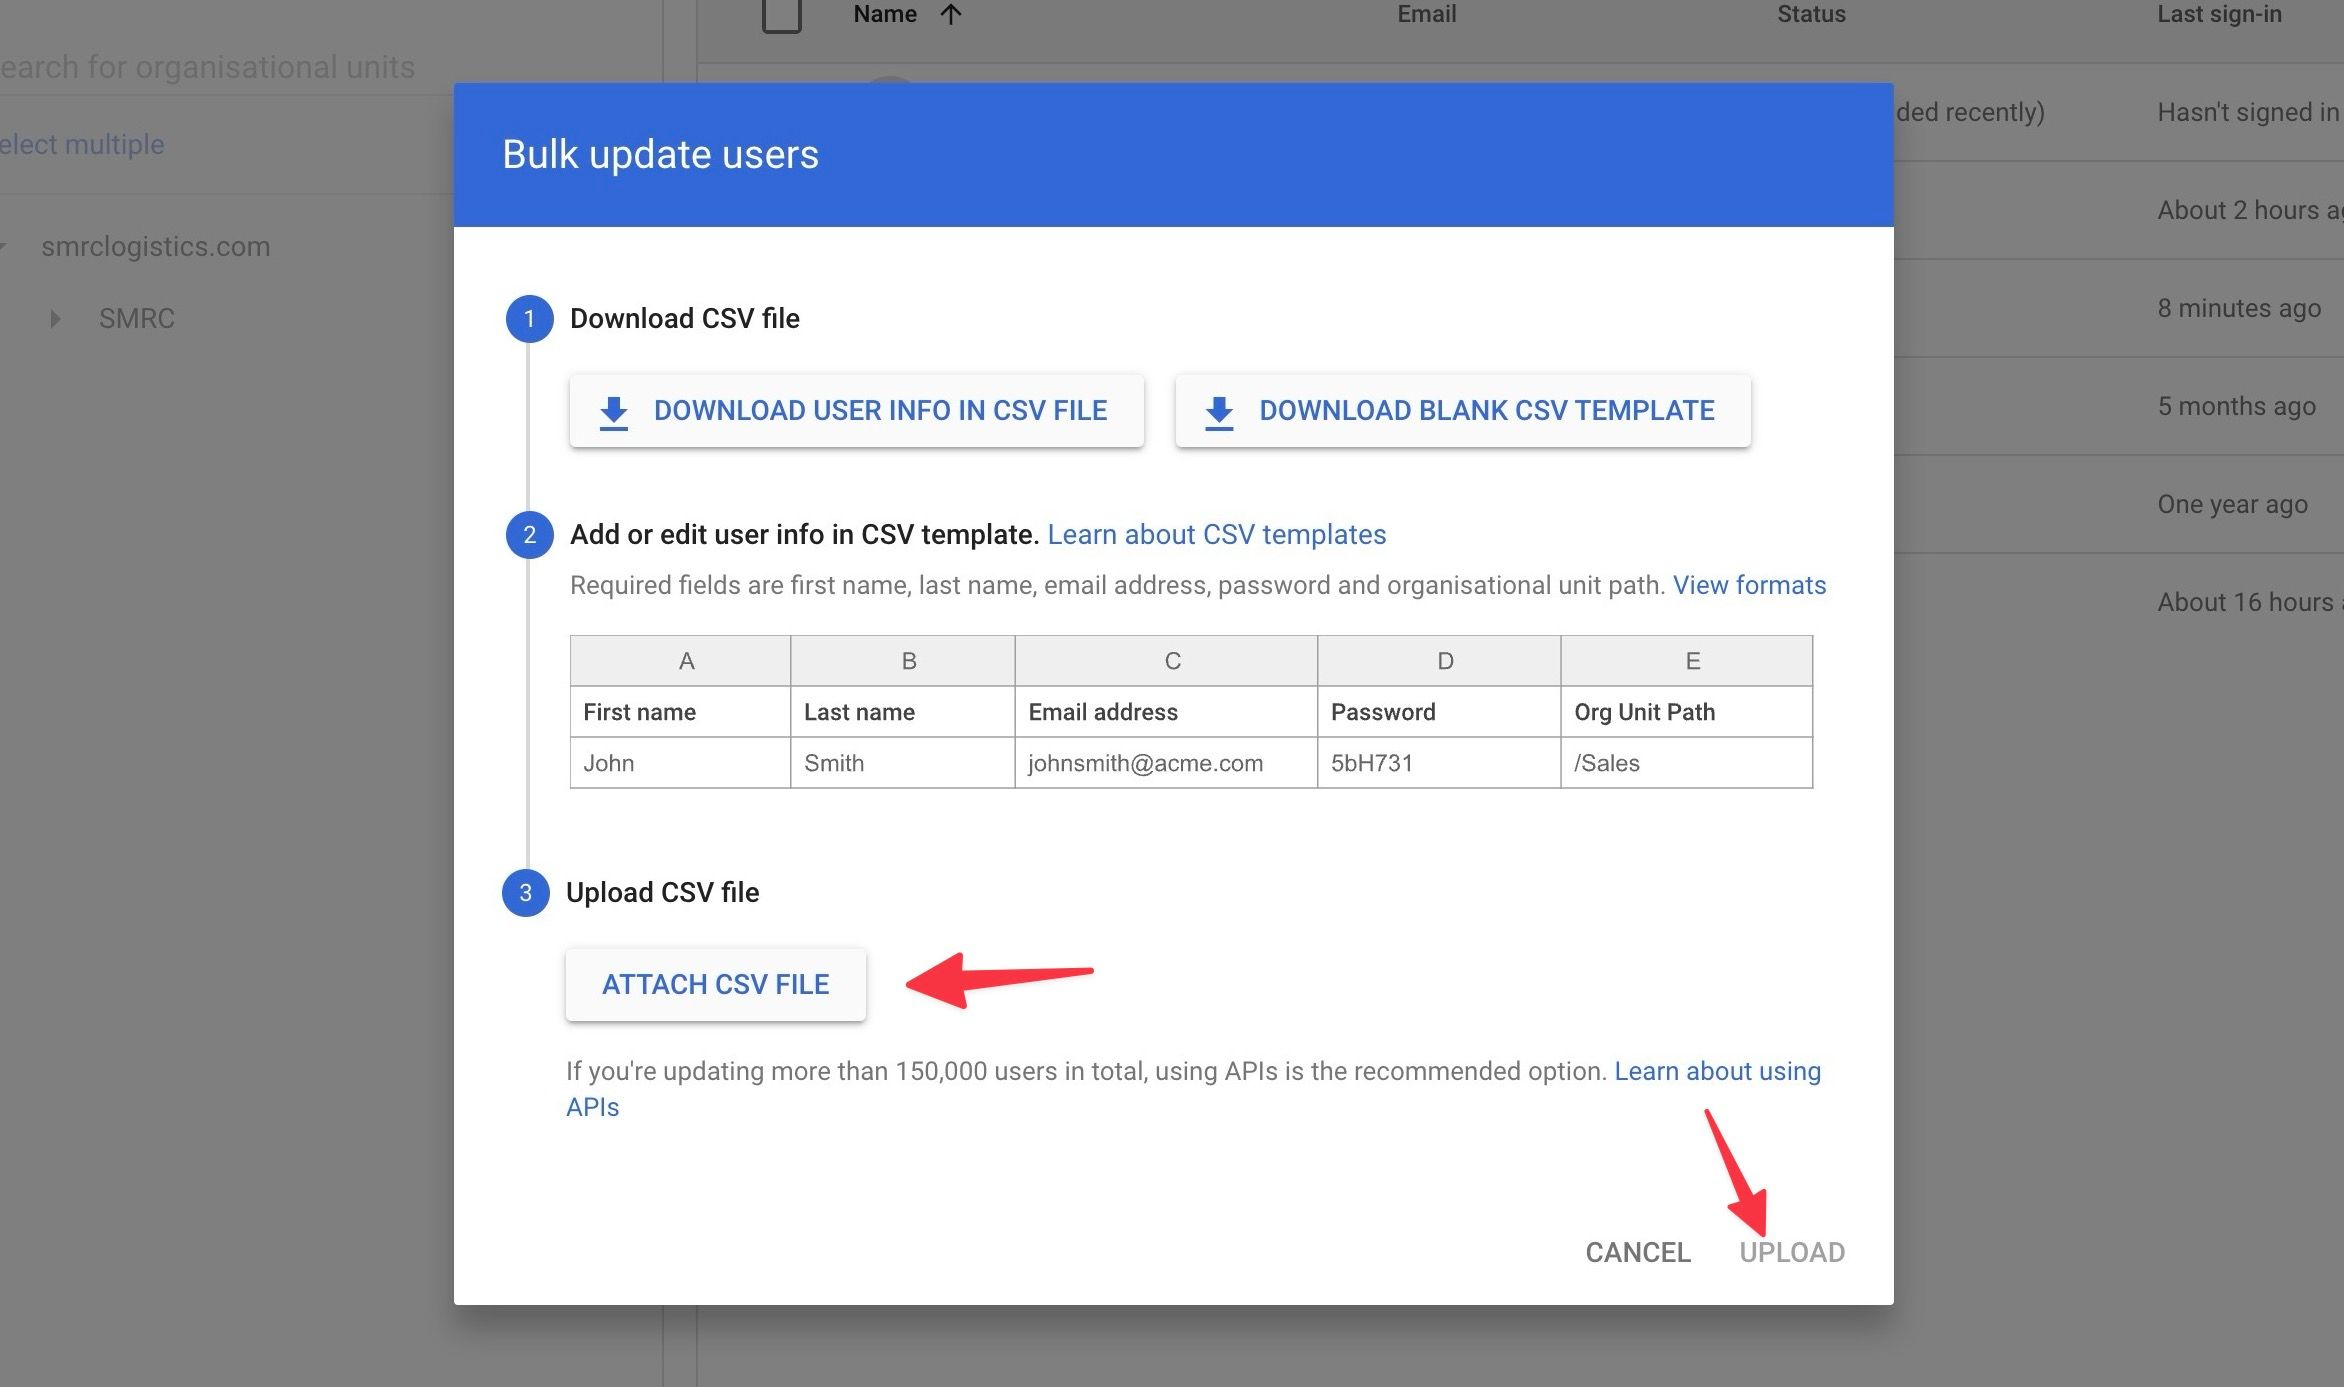
- Open. Bulk user update menu and select Attach CSV file. Upload your CSV file and click on the same.
Unlike the above trick, you cannot add someone’s personal email address to send the welcome email. You must send these credentials to your users separately.
Google Workspace also allows users to create email aliases to send and receive email at different addresses. This is also a useful add-on for small organizations where someone wears multiple roles. You can add up to 30 email aliases for each user for free.
Collaborate in style
After you invite users to your Google Workspace plan, monitor their activity and usage. You should also implement two-factor authentication for all users to ensure that only authorized personnel can access sensitive corporate data. If one of your employee’s girlfriends leaves your organization, use Google Takeout to migrate her data from Google Workspace.

